- Go to AI Agents
- Click on the AI you created
- You will see the following tabs:
- Instructions
- Actions
- Knowledge
- Settings
1. Instructions
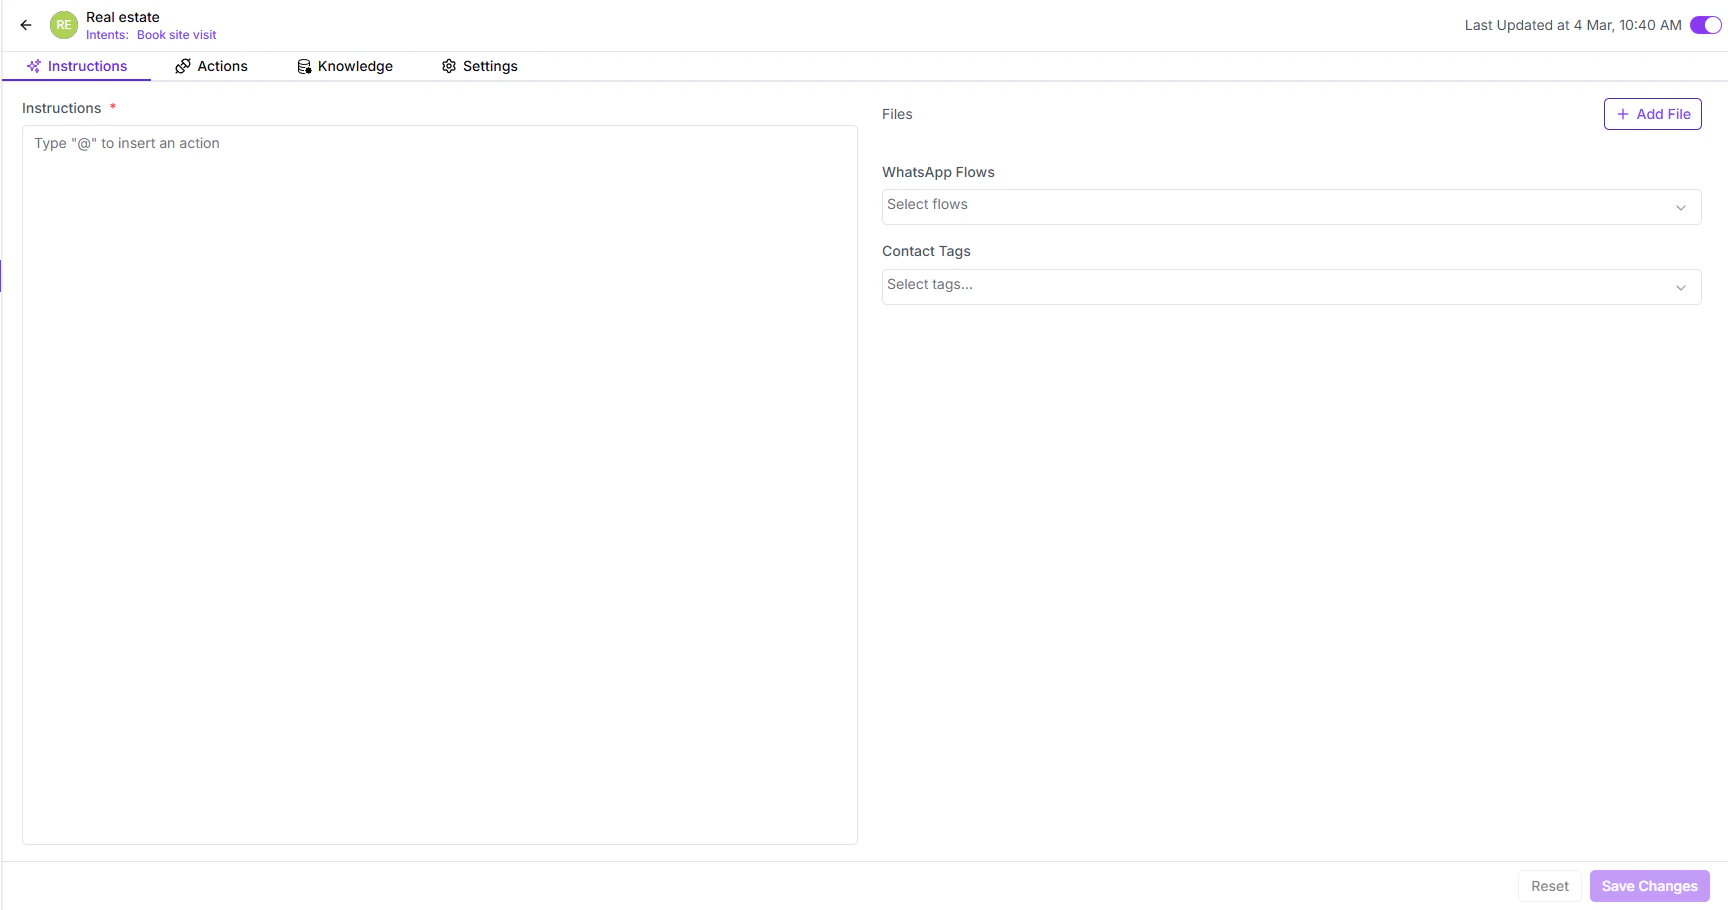
What You Can Add in Instructions
You can:- Define how the AI should talk (formal, friendly, sales tone, support tone)
- Define what it should do
- Add conditions
- Insert actions
- Attach files
- Link WhatsApp flows (forms)
- Apply contact tags
Using Actions in Instructions
Inside the Instructions box, type @ to insert an action. When you type @, a list of available actions will appear. You can select:- Assign conversation
- Resolve conversation
- Add a note
- Tag a customer
- Share a file
- Trigger a WhatsApp flow
- Custom API action
2. Knowledge
The Knowledge section allows you to attach relevant information sources to the AI Agent.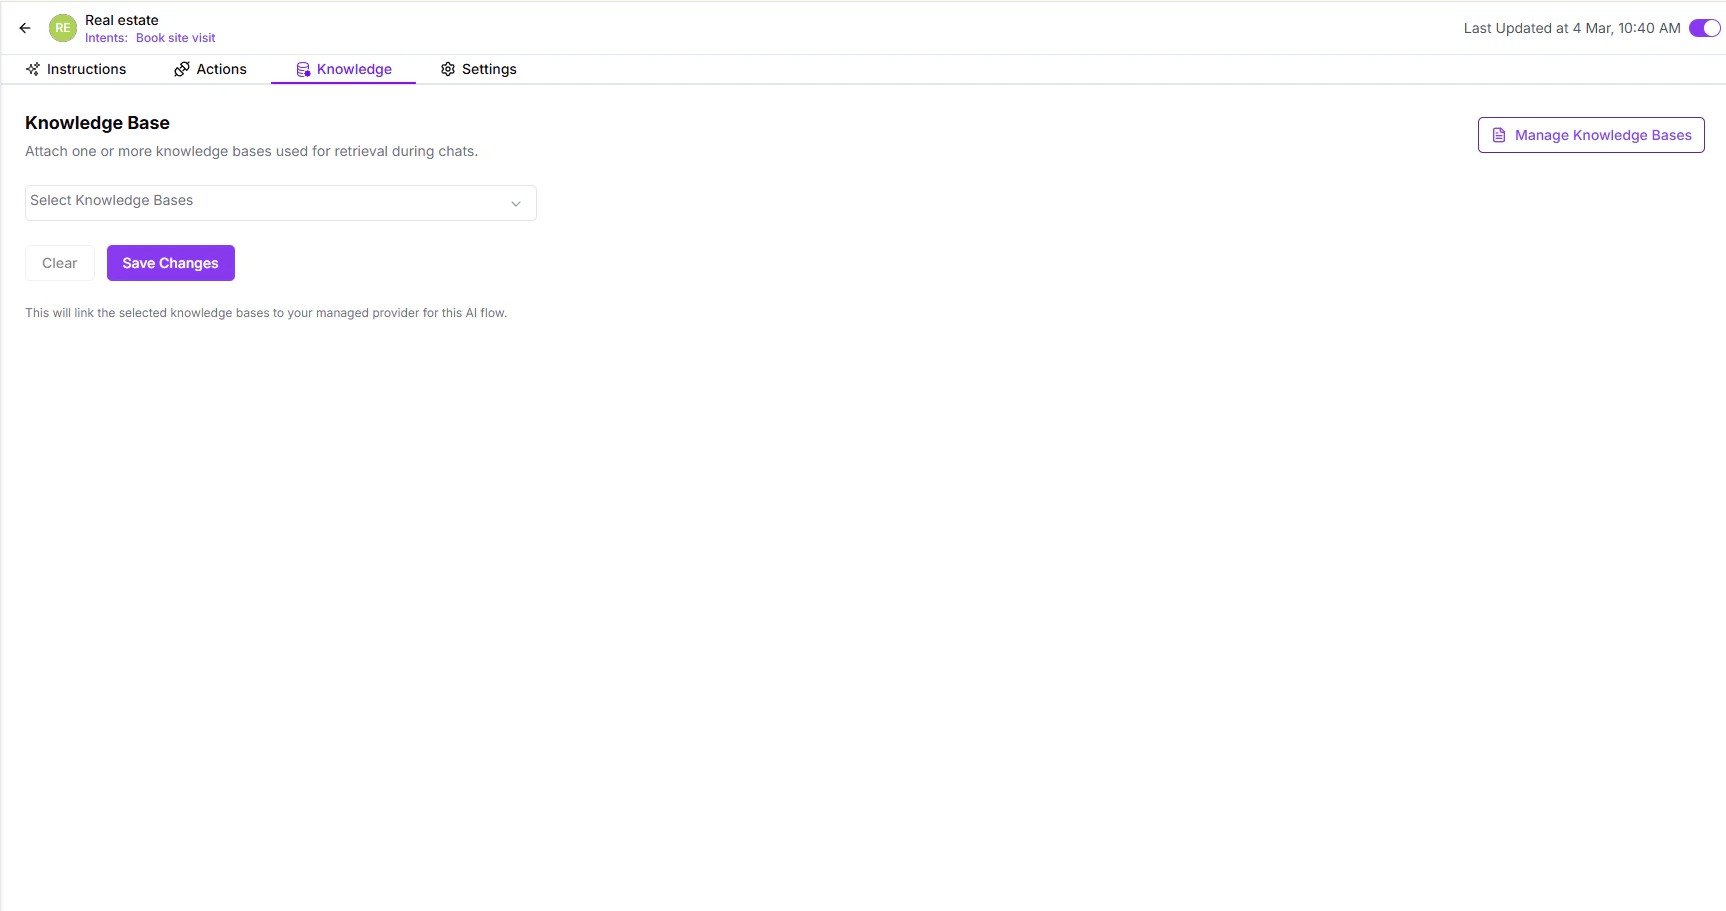
- Click Manage Knowledge
- Select the knowledge base you want
- Attach it to the specific AI Agent
- Support documents
- Product information
- FAQ documents
- Policy documents
- Support Knowledge Base
- Sales Information Knowledge Base
3. Settings
The Settings tab allows you to control the AI model behavior and technical configuration.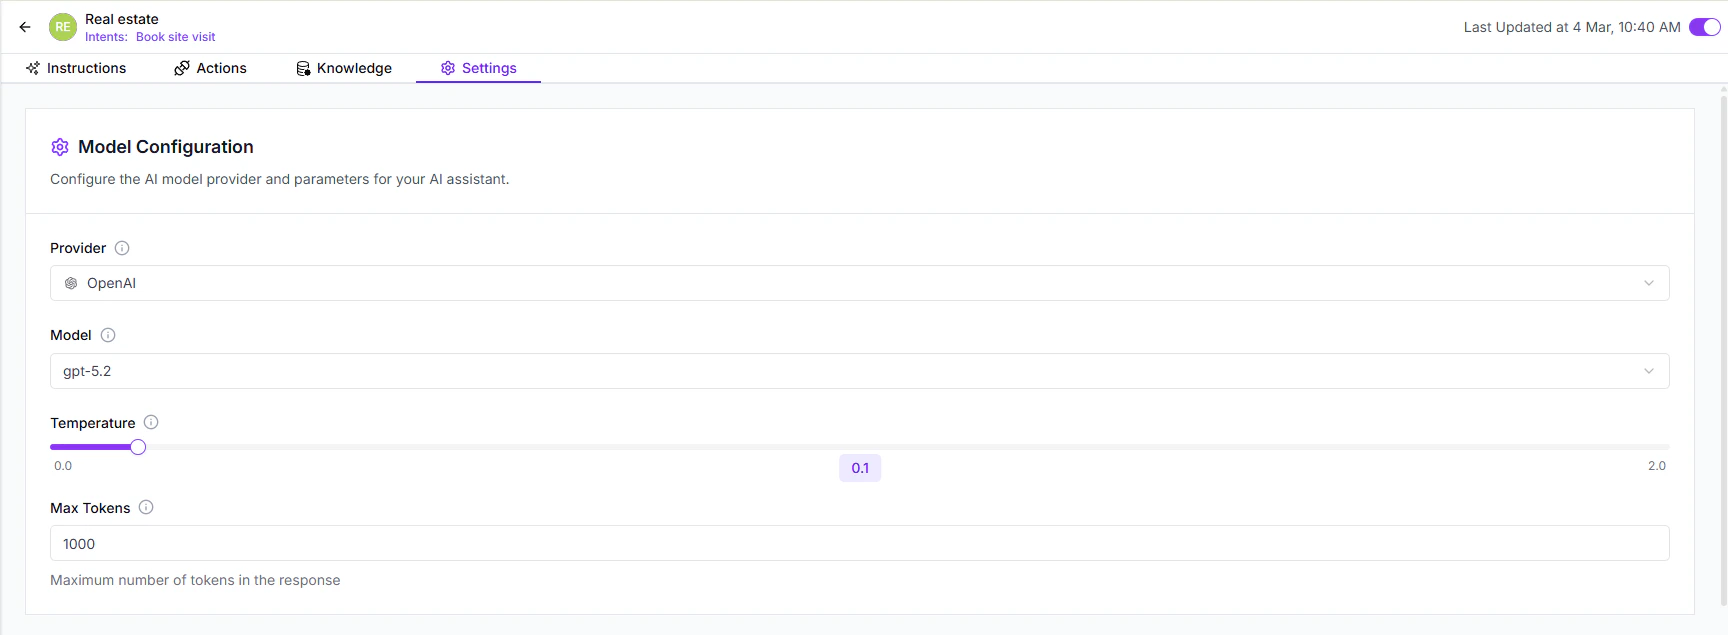
AI Provider
You can choose the AI provider:- OpenAI
- Gemini
- Anthropic
- Others (based on availability)
Model Selection
You can select the model version such as:- gpt-5.2
- gpt-5-mini
- Other available models
Temperature
Temperature controls randomness in responses.- Lower values → More focused and deterministic responses
- Higher values → More creative and varied responses
- 0.1 → Very structured responses
- 0.8 → More creative responses
Tokens
Defines the maximum number of tokens in the response. Higher token limit → Longer responsesLower token limit → Shorter responses
Processing Capabilities
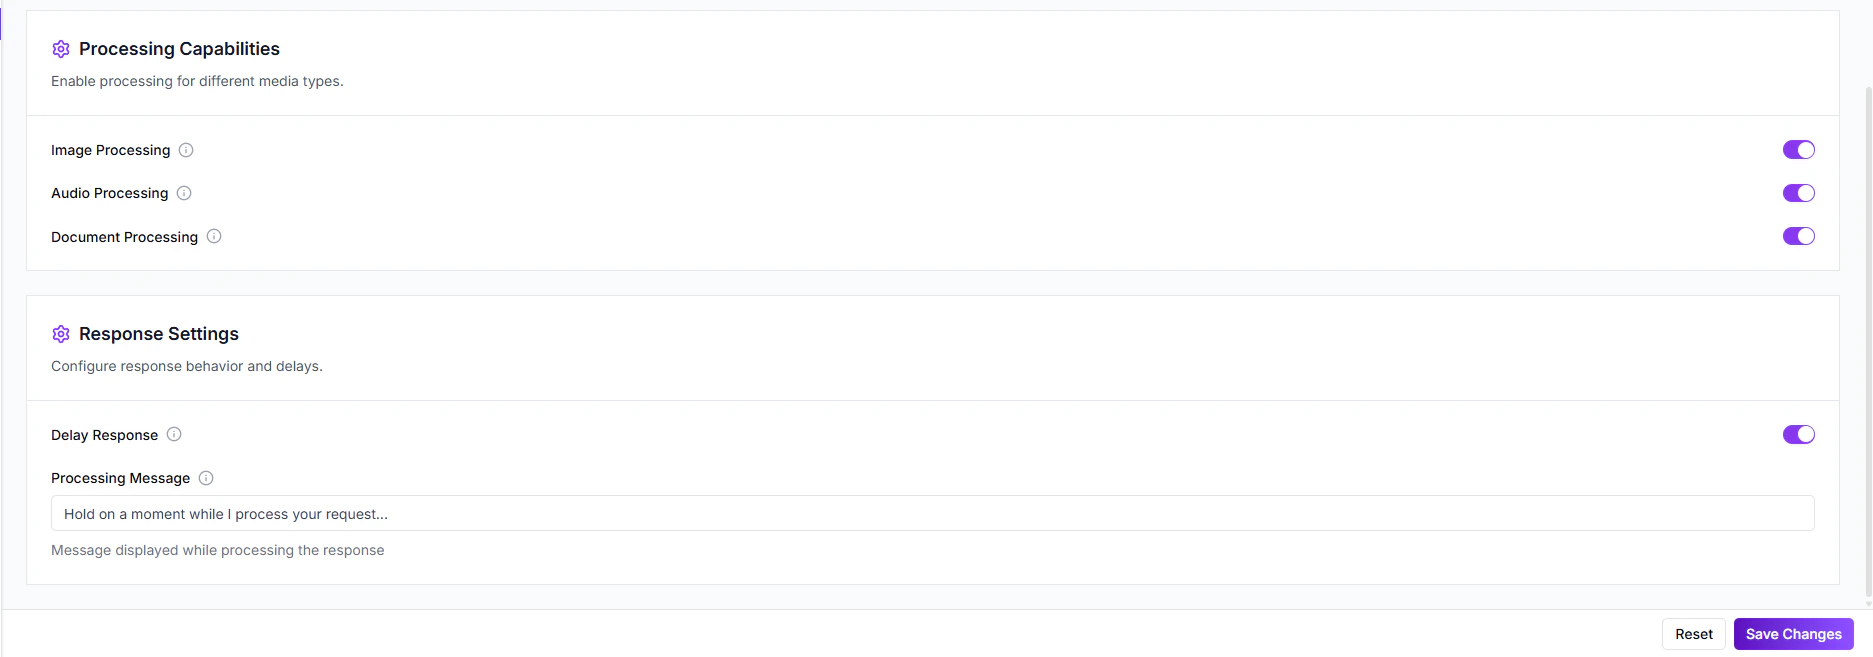
Image Processing
If enabled, the AI can understand and respond to image inputs. You can turn OFF the toggle if not required.Audio Processing
If enabled, the AI can process audio messages. You can disable it if your use case does not require audio handling.Document Processing
If enabled, the AI can read and process document files shared by customers. You can turn it OFF if not required.Response Settings
This section controls response behavior and delay settings.Processing Message
Default message shown while AI is generating a response:“Hold on a moment while I process your request…”You can:
- Edit this text
- Turn OFF the toggle if you don’t want a processing message